Creative DIY Home Decoration Project - Napkins as a Wall Art
As a girl, I loved collecting napkins. I'm not talking about collecting them by buying them. When I talk about collecting napkins, I don't mean collecting by buying them, but by exchanging them with friends and making a genuine effort to get the one you find most beautiful. Back then, you had to buy a whole pack of napkins (because it wasn't possible to buy individual napkins like it is today, something I believe the decoupage technique has contributed to) and it was hard to decide on just one because all the napkins were beautiful.
However, over the years, my treasured collection ended up tucked away in a box, hidden from view. Recently, with the luxury of my own craft room, I decided it was time to bring these beautiful pieces out of hiding and transform them into something more meaningful. That’s when I came up with the idea of framing my napkins and turning them into wall art.
How to make your napkins wall art
Each napkin, with its design and vibrant colors, was a tiny piece of art on its own. But instead of letting them remain unseen, I wanted to create a display that would allow me to appreciate their beauty every day. Framing them not only preserves them but also turns them into unique pieces of wall art that can be cherished and admired.
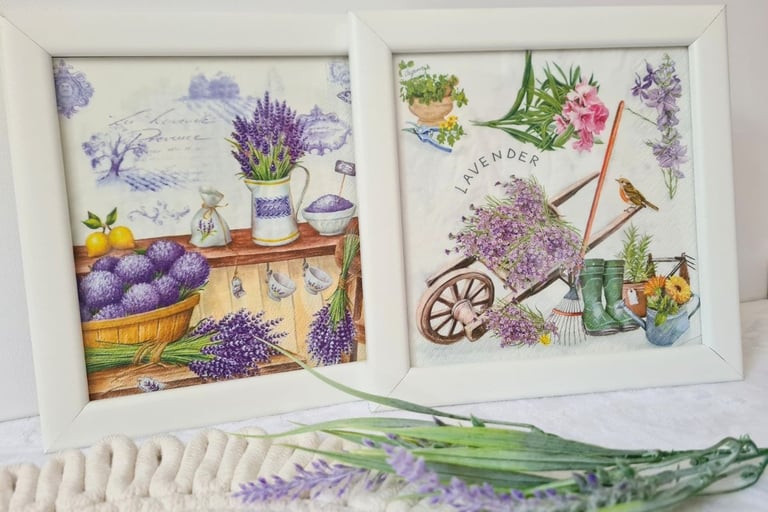
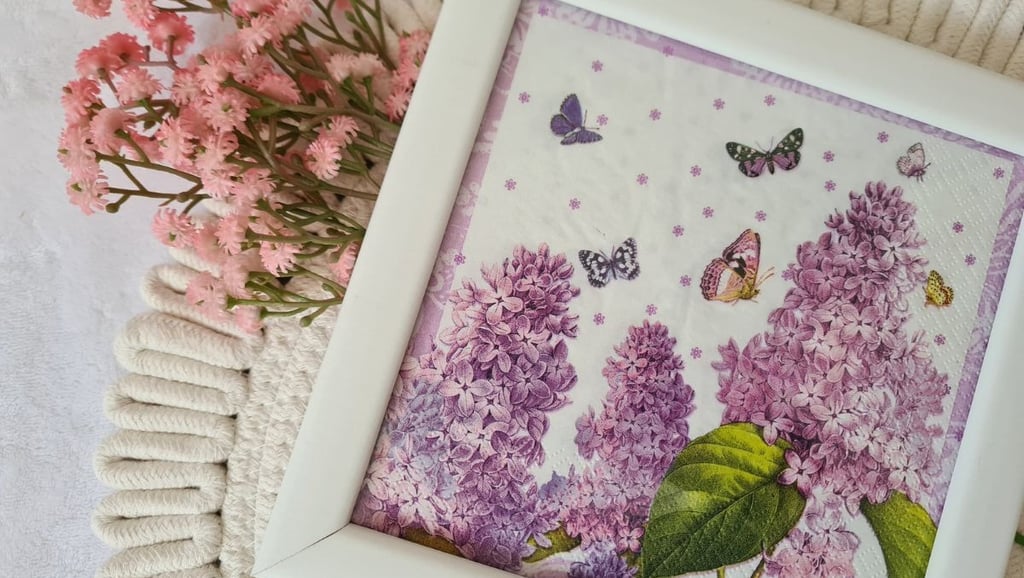
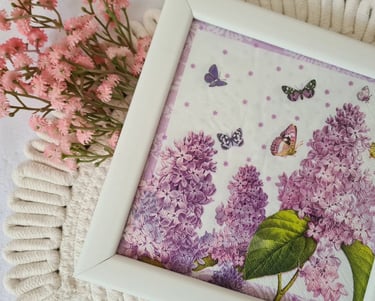
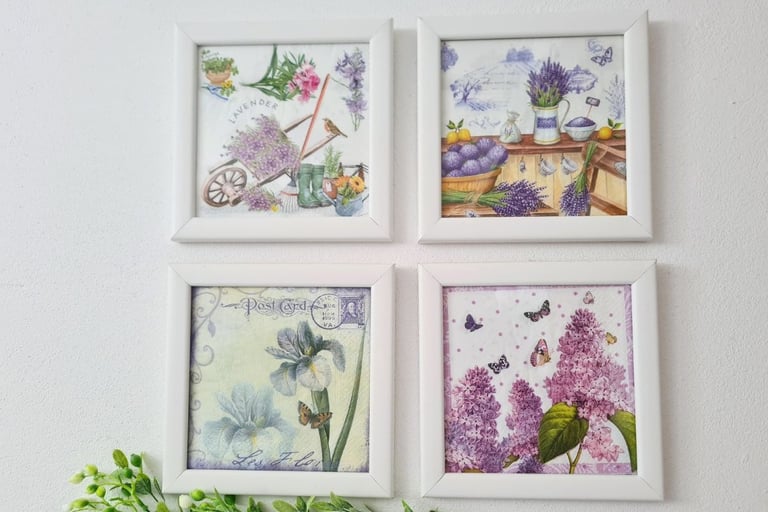
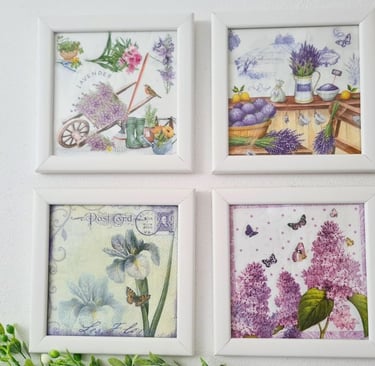
Group your napkins into smaller collections with a certain theme to make a cohesive look.
Pick a Place
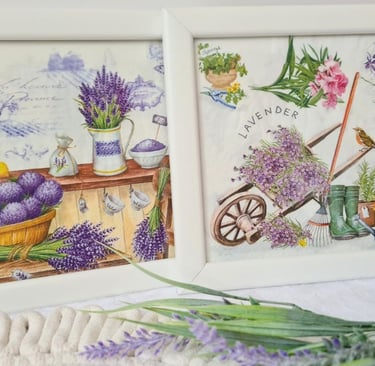
Depending on the size of the napkins, you need to decide on which wall to display them and how many to use. In my craft room, I designated a corner where I can fit 4 frames with napkins, forming a square, with each napkin being around 6 x 6 inches (15 x 15 cm).
Pick a Theme
I love to change themes seasonally. Here are a few ideas:
Spring
Floral Napkins: Bright and colorful flowers to celebrate the blooming season.
Pastel Colors: Soft hues like light pink, mint green, and baby blue to reflect the gentle colors of spring.
Easter Themes: Napkins featuring bunnies, eggs, and springtime motifs.
Summer
Beach and Ocean: Napkins with seashells, starfish, and ocean waves.
Bright Colors: Bold and vibrant colors like yellow, orange, and turquoise.
Tropical Themes: Palm trees, tropical flowers, and fruity designs.
Fall
Autumn Leaves: Napkins adorned with leaves in shades of red, orange, and gold.
Harvest Themes: Pumpkins, cornucopias, and other fall harvest symbols.
Warm Tones: Rich colors like burgundy, mustard, and deep green.
Winter
Snowflakes and Snowmen: Winter wonderland designs featuring snow-themed elements.
Holiday Themes: Christmas trees, ornaments, and festive patterns (how I did it video)
Cool Colors: Icy blues, silvers, and whites to capture the chilly season.
Tip: You can choose the theme based on what you love (cooking, traveling, animal lover), based on color (black and white, blue, red), pattern (stripes, dots, abstraction), etc.
Pick a frame
To frame my napkins, I reached out to a local glass artisan, bringing along one napkin for them to craft a frame that fits its dimensions perfectly. I've opted for a white frame, but you'll certainly choose the one that suits the space where this wall art will be placed, the color of the napkins (whether in contrast or not), and personal preferences. I asked the glass artisan to make the back of the frame in a way that allows for changing the napkins inside whenever I want, instead of permanently sealing the frame.
Bonus idea: If you still don't want to drill a hole in your wall but like this idea, you can create a tabletop decoration instead. This is especially interesting for smaller napkins as well as wedding napkins with the names of the newlyweds and the date, which are lovely and cherished mementos of that day.
By changing the themes of my framed napkins seasonally, I can keep my craft room fresh and inspiring all year round.