3 Simple and Easy DIY Projects - Crafting Christmas Ornaments Ideas
As the Christmas season approaches, it’s the perfect time to get creative and craft some beautiful, unique decorations—either for yourself or as heartfelt gifts for family and friends. This is also when I love diving into my “maybe someday” stash to reuse or repurpose materials for something special. To inspire you to get started, I’m sharing three simple and easy DIY Christmas tree ornament ideas that are perfect for both adults and kids. I’ve even created short videos for each project, which you can find on my YouTube channel—be sure to check them out!
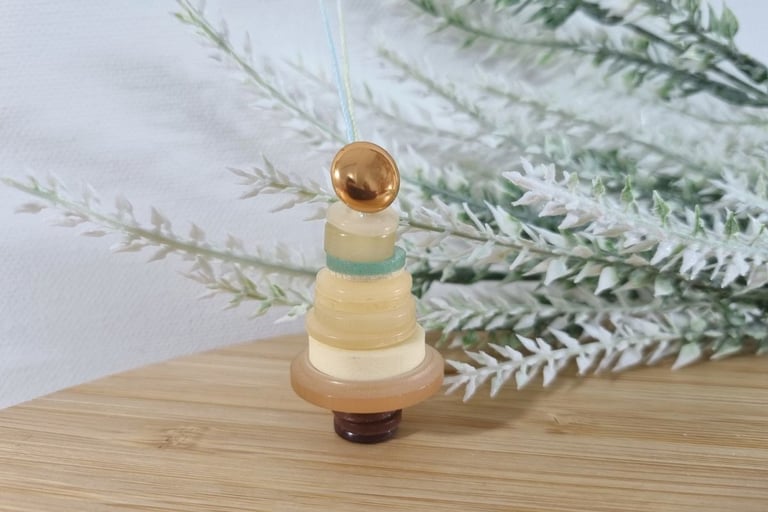
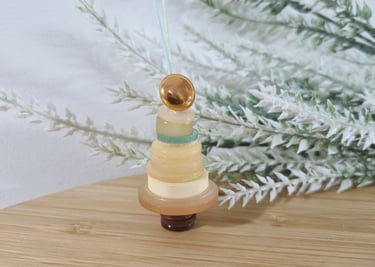
Use Your buttons stash
Back when I was a student, I loved collecting buttons. While I’m not as passionate about it now, I still treasure my collection, which is why showcasing them in a DIY project feels like the perfect way to give them new life. If you have a stash of buttons, here’s a fun and creative project to try! Supplies you'll need:
3–4 small brown buttons (all the same size)
10 white buttons (or any colors you prefer, in different sizes)
1 shank button
Cord (make sure it’s thin enough to fit through the smallest buttonhole)
Scissors
How to make it (video)
String the small brown buttons onto the cord. These will serve as the base of your ornament.
String the white buttons onto the cord, starting with the largest and working your way to the smallest.
Place the shank button on top of the stack. When threading the cord through the hole of the shank button, pass it through twice to ensure it stays securely in place.
Tie a firm knot and trim any excess cord above the knot.
And that’s it! You’ve created a simple yet charming ornament using your button stash.
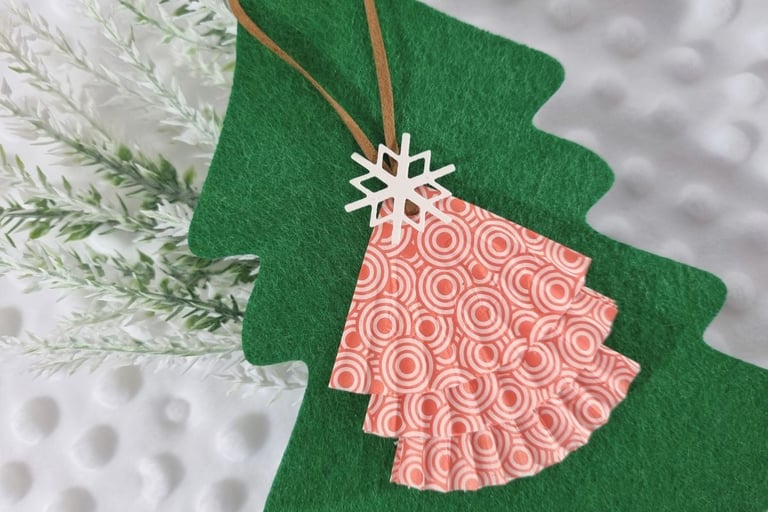
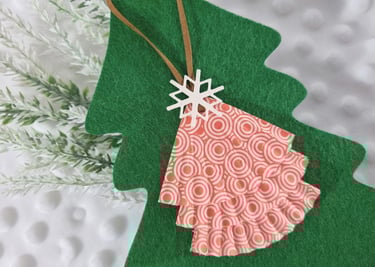
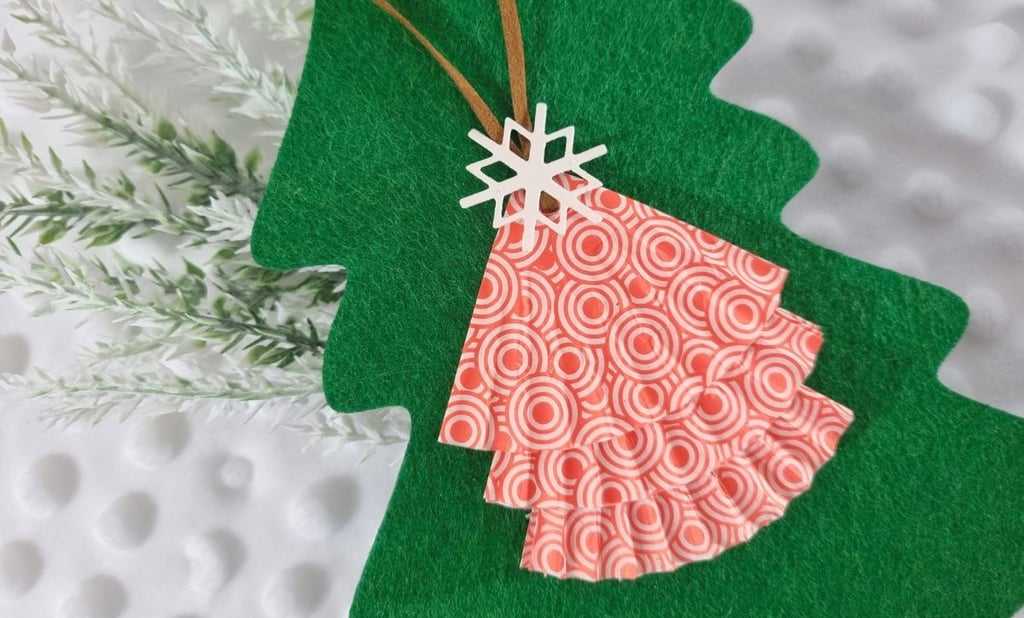
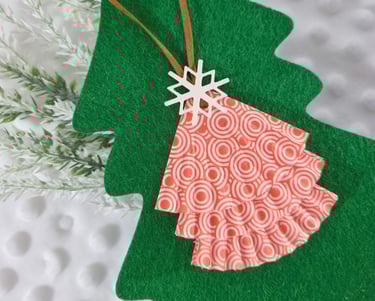
Use Muffin Cups to make a Christmas tree ornament
As someone who loves baking muffins, I always have a stash of muffin cups in my kitchen. I can’t resist picking up different designs to match the season or celebration theme. I like to mention that these types of ornaments are kid-friendly since they are made of paper. Here’s what you’ll need to make them:
3 paper muffin cups
Embellishment for the top (optional)
Cord
Paper glue
A pointy tool for making a hole
Scissors
How to make it (video):
Flatten the muffin cups and fold each one in half. Then, fold them in half again to create a cone shape that resembles part of a Christmas tree.
Apply paper glue to the top of both sides of the folded muffin cup. Place it inside another folded cup, starting from the bottom. Gently press them together to shape it like a tree, with the cups stacking on top of each other.
Use a pointy tool to make a small hole near the top of the ornament. Thread a piece of cord through the hole, tie a loop, and trim any excess.
If you'd like, attach an embellishment, like a small star or button, to the top of the tree for extra decoration.
And there you have it—a cute and festive Christmas tree ornament made from simple muffin cups!

Reuse car air freshener
Car air fresheners come in so many fun shapes, and I love picking ones that can be reused for creative projects. This past summer, I picked up several tree-shaped air fresheners, and last week, I turned them into festive Christmas tree ornaments. Here's what you'll need to create your own:
A car air refreshener
Acrylic paint
A brush
Decorations (such as paint, stickers, wooden elements, die-cut pieces, buttons—there are so many possibilities!)
Cord
Glue (depending on the embellishments you choose)
Scissors
A pen (if you’d like to write something on it)
How to make it (video):
Start by painting the car air freshener with acrylic paint. Let it dry completely.
Once the first side is dry, flip it over and paint the other side. Allow it to dry as well.
Now the fun part! Use whatever decorations you like—paint, stickers, buttons, wooden pieces, die-cuts—get creative and make it your own!
Since car air fresheners already have a hole, simply thread the cord through it and tie a knot.
And there you have it—your very own custom Christmas tree ornament made from a reused car air freshener!
I hope one of these ideas inspired you, and I’d love for you to give them a try! Let me know how it turns out—I’d be thrilled to see your creations. Happy crafting!