Make Christmas Card Using Straws

Continuing with Christmas crafting and card-making ideas, here’s another fun and easy project for you! This time, I’ll guide you through a detailed tutorial on how to make a Christmas card using straws with some extra tips and tricks at the end. I’ve also uploaded a short video on my YouTube channel showing the process, so feel free to check it out!


Easy Christmas Card tutorial
Here’s what you’ll need to make this card:
Card base: Choose any color of cardstock you like.
Paper straws: You’ll need at least 3, but the number depends on the size of your card.
Ruler
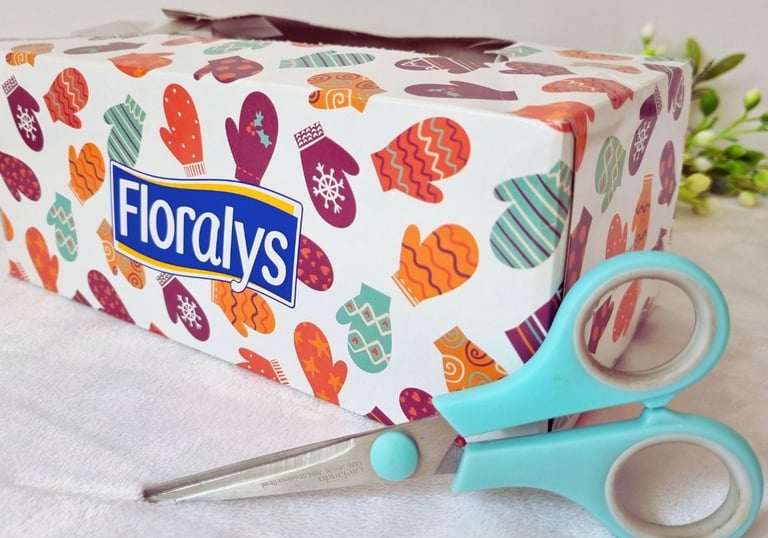
Scissors or a paper knife
Paper glue
Brown marker
Clear stamping tool: Includes ink, a clear stamp, and an acrylic block or stamping pad.
Paper punch shape and a yellow marker (optional).
How to Make a Paper Straw Christmas Tree Card:
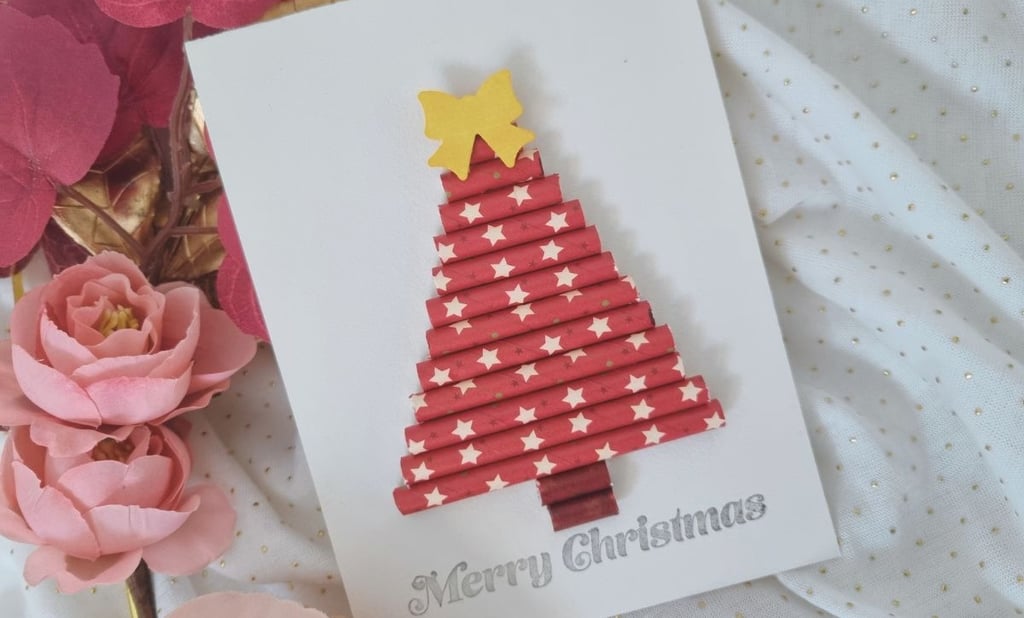
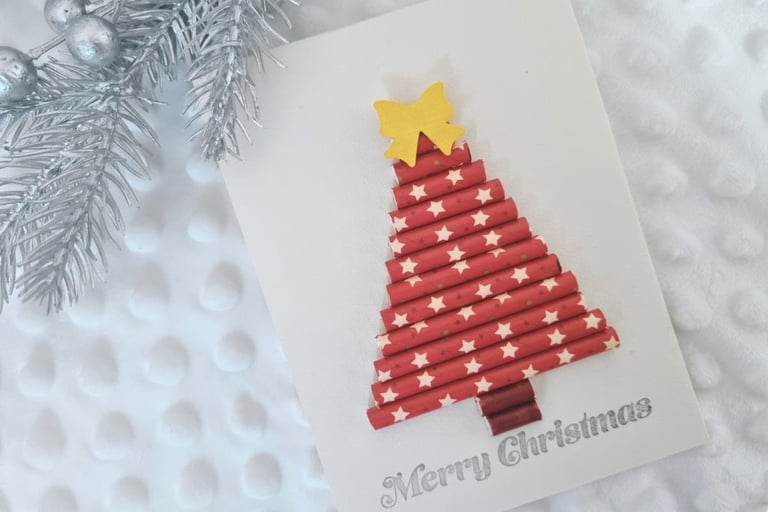
Measure and Mark: Use a ruler to measure and mark your straws. Start with a length of 3 inches (around 8 cm), and make each subsequent piece 1/4 inch (around 5 mm) shorter than the previous one, down to 1/2 inch (around 1 cm). You’ll need 11 pieces for the tree branches.
Prepare the Tree Base: Cut two additional straw pieces, each measuring 1/2 inch (around 1 cm), for the tree trunk. Color these two pieces with a brown marker.
Cut the Straws: Use scissors or a paper knife to carefully cut the straws along the marked lines.
Add a Greeting: Use your clear stamping tool to add a festive Christmas greeting to the bottom (or top) of the card.
Assemble the Tree: Arrange the straw pieces on the card base to form a tree shape, starting with the longest piece at the bottom and working your way up to the shortest piece at the top. Place the two brown-colored pieces at the very bottom for the trunk. Glue all the pieces in place.
Add the Finishing Touch: Use a bow-shaped paper punch to cut out a bow. Color it yellow with your marker and glue it to the top of the tree as the star.
Your festive straw Christmas card is now ready to spread holiday cheer!

Extra tips and tricks:
If the straw ends get flattened when cutting them with scissors, use a pencil to gently reshape them back to their original round form.
For the longest straw piece, apply glue directly to the straw before sticking it onto the card base. For all subsequent pieces, apply glue to the card base first, then attach the straw piece. This method helps you position each piece more accurately, but feel free to use whichever technique works best for you.
To make your card stand out, heat emboss the Christmas greeting for a polished, shiny effect. Consider using glittery paper or foam paper to decorate the tree’s top for an extra festive touch. Straws come in endless patterns, so pick the ones that feel the most festive and fun to you!
Your festive straw Christmas card is now ready to spread holiday cheer!
You can also use this tutorial to create festive Christmas wall art! Instead of using small straw pieces, start by forming the tree with a whole straw as the base. Then, cut each subsequent piece 1/4 inch shorter than the previous one to create the tree shape. This method works perfectly for larger projects like wall decor.