Card Making Layers: A Beginner's Guide to Layering Cards
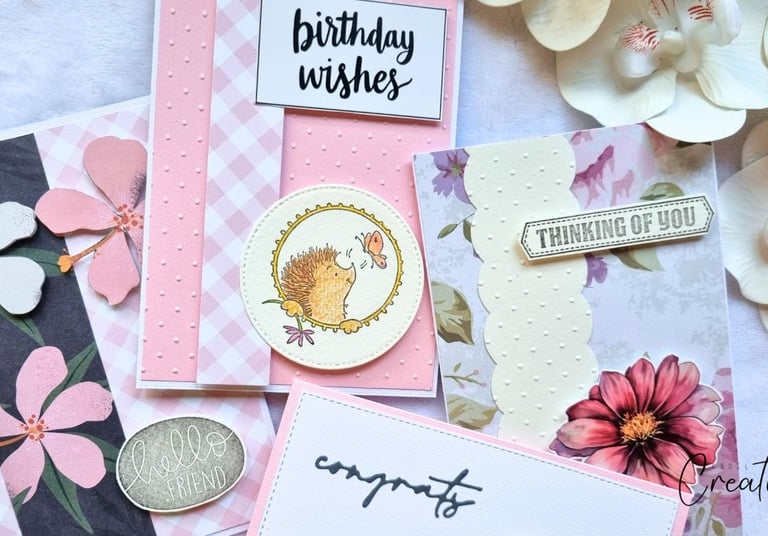
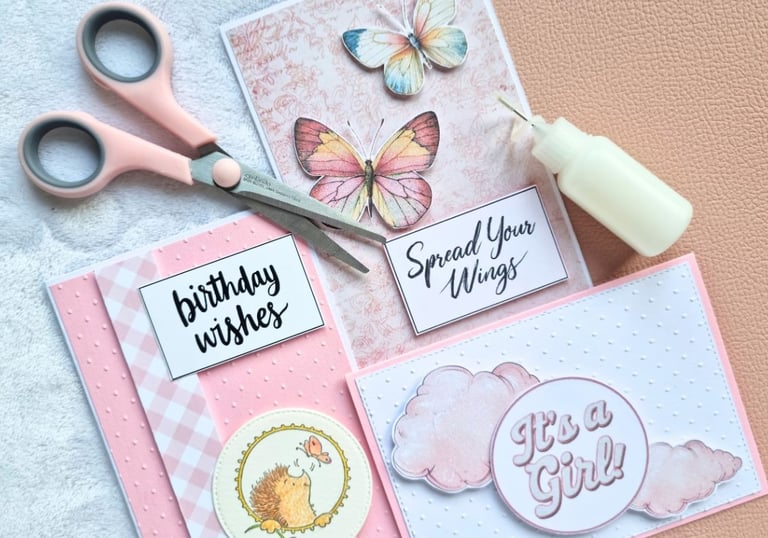
Layering is one of the easiest ways to make handmade cards look more polished and balanced. Even simple designs can look thoughtful and well put together when a few layers are stacked in the right way.
If you’re new to card making, learning how card bases, backgrounds, panels, and mats work together will make the whole process much easier—and a lot more enjoyable. Once you understand these basic building blocks, you can create endless card layouts using the same simple idea: placing one layer on top of another to create depth and visual interest.
Many beginner cards look a little unfinished simply because everything sits directly on the card base. Adding even one extra layer can instantly change that. It frames your design, helps guide the eye, and gives your card that familiar handmade look we all love.
And the best part is that layering doesn’t require complicated techniques. It’s really just about understanding a few basic pieces and how they fit together.
The Basic Card Layers in Card Making
When you look at a layered card, it may seem like a lot is happening, but most designs are built from just a few simple elements.
Card Base
The card base is the foundation of the entire card. It’s the folded piece of cardstock that holds everything together. Common sizes are 7 × 5 inches, 6 × 4 inches, or square cards like 5 × 5 inches. Once folded, this becomes the structure that all other layers are attached to.
Background Layer
The background layer sits on top of the card base and usually covers most of the card front. This layer can be plain cardstock, patterned paper, or a lightly decorated background. It helps create contrast between the card base and the rest of the design.
Mat Layer
A mat layer is slightly smaller than the background layer and acts like a frame. Mats are often used to highlight a panel or focal image. Even a very thin border around a panel can make the design feel more intentional and balanced.
Panel
The panel is usually where the main design lives. This might include stamped images, illustrations, patterned paper, or a simple sentiment. The panel is the part of the card that draws the most attention.
Sentiment or Focal Element
This is the final layer — the message or decorative element that completes the card. It could be a sentiment strip, a small illustration, a stamped image, or even a layered embellishment. When all these pieces are stacked together, they create a finished layered card.
How Card Layers Work Together
One simple rule that helps beginners understand layering is this:
Each layer is slightly smaller than the one below it.
This creates those small borders around each piece that make layered cards look neat and balanced. The borders don’t have to be large. Even a difference of a quarter inch can make a big visual impact.
Once you understand this idea, you can mix different papers, colors, and textures while keeping the card layout organized and easy to follow.
Layering is also a great way to experiment. You can shift panels slightly off center, stack small pieces together, or add sentiment strips across a panel to create new variations of the same layout.
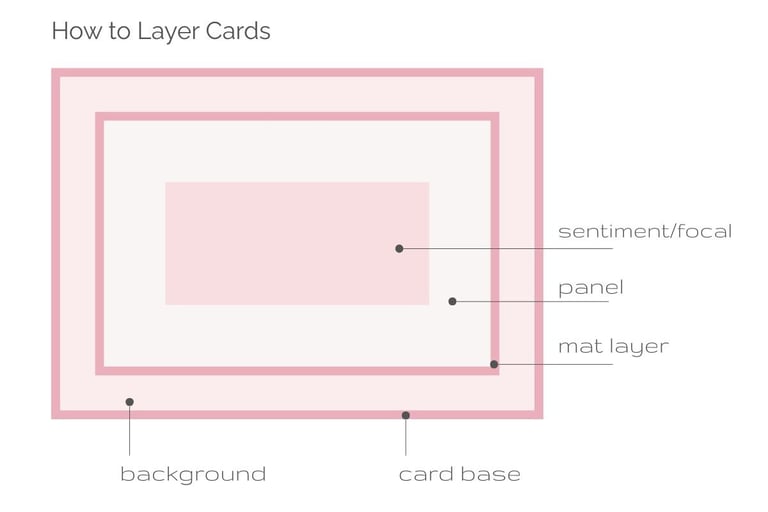
How to Layer Cards: Basic Layer Structure
Most layered cards follow a simple structure that looks like this:
Card Base
Background Layer
Mat Layer
Panel
Sentiment or Focal Element

Even though this structure is simple, it creates a clean and balanced card layout that works for almost any occasion. You can keep it minimal with just two layers, or build up more depth by adding extra mats or smaller panels.
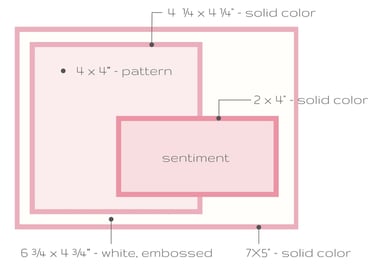
Card Layering Measurements
One thing many card makers quickly realize is that measuring and cutting layers can take almost as much time as making the card itself.
For me, measuring has always been the least exciting part of the process. Sometimes I’m really excited to start creating a card idea, but before I can begin I have to measure the card base, trim the background layer, cut a panel, and double-check the sizes.
It’s not difficult — but it’s definitely the least creative step.
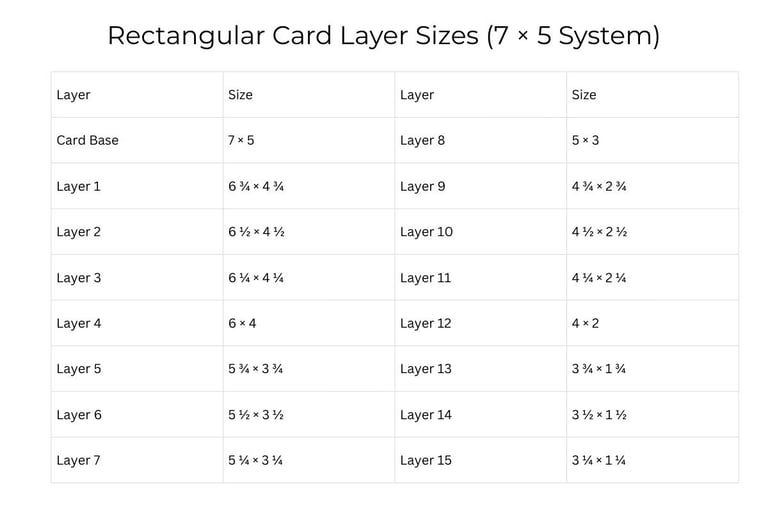
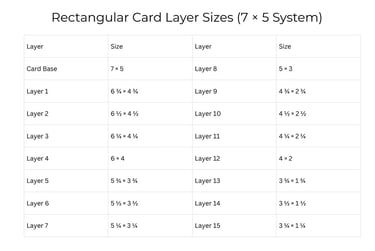
That’s why I created a printable collection of card bases and layers designed especially for beginners. The layers are sized using the above system so they fit together naturally, which makes it simple to experiment with different layouts without worrying about measurements.
You can print the layers once, cut them out, and keep them together as a small reference set. When you’re ready to make a card, you can quickly pick the size you want and trace the layer. It saves time and lets you jump straight into the creative part of card making.
If you’re just starting with card making, having this set of ready-to-use layers can make the process much easier. It’s a small tool, but it can make the creative part of card making feel much more relaxed and enjoyable.


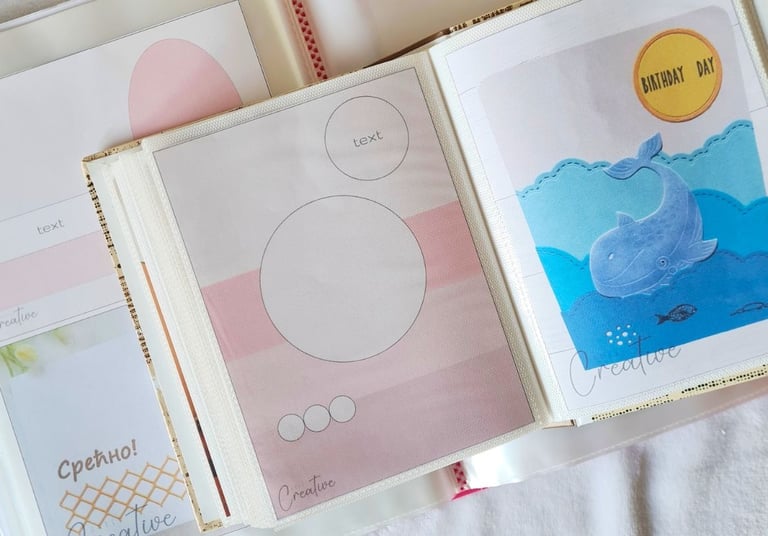
5 Simple Layered Card Sketches
If you’re new to layering cards, card making sketches can make the process much easier. They give you a starting point without limiting your creativity and help you see how different layers can work together on a card front.
Below are a few simple layered card ideas that use beginner-friendly layouts and common card sizes.
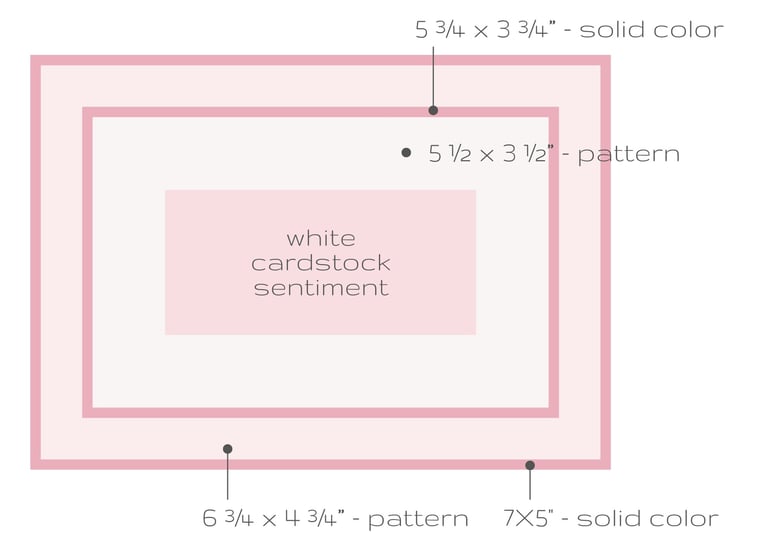
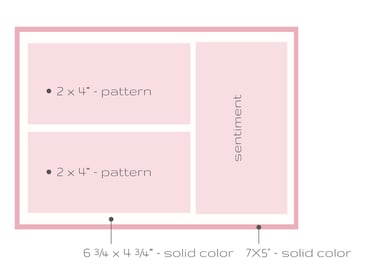
Layered Card Idea no. 1
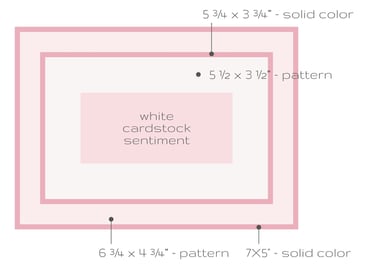
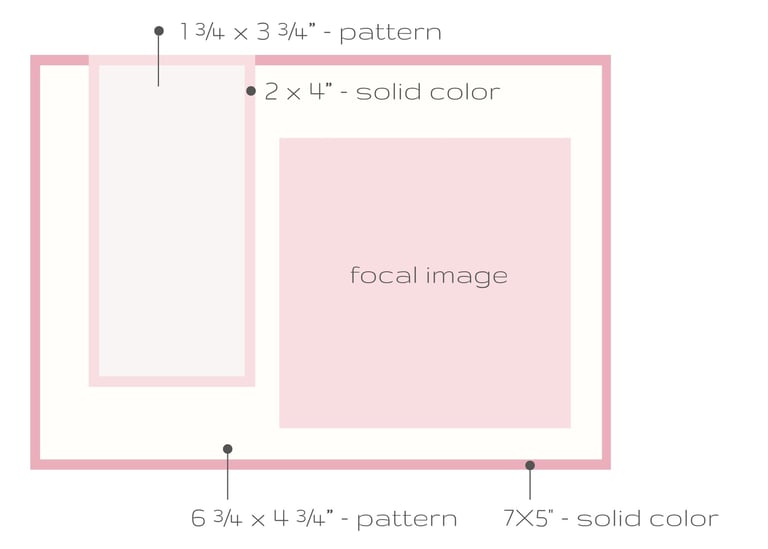
Layered Card Idea no. 2

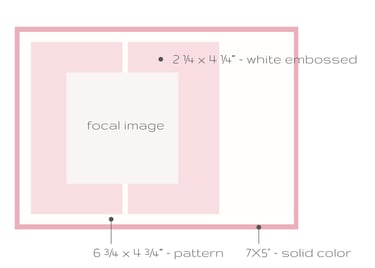
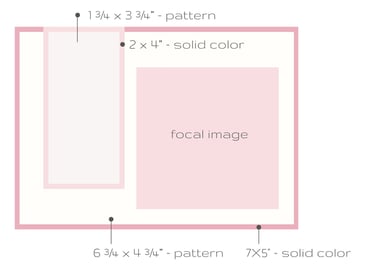
Layered Card Idea no. 3
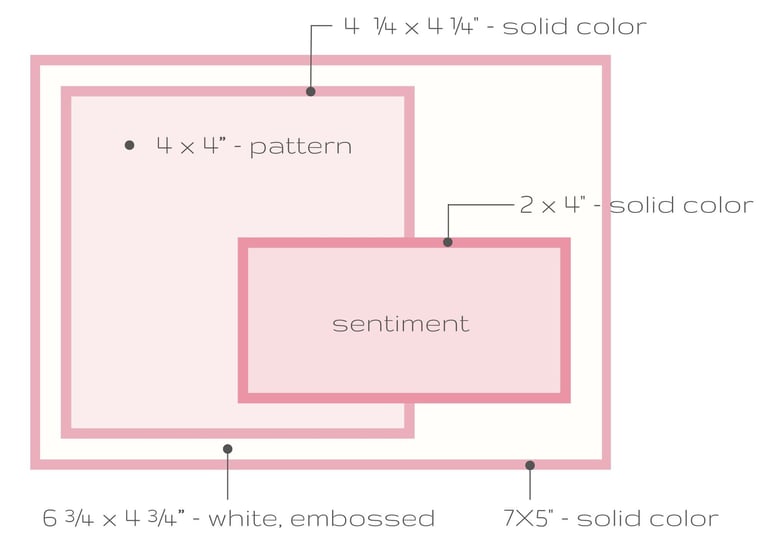
Layered Card Idea no. 4

Layered Card Idea no. 5
If you enjoy working with sketches, you might also like my previous blog posts dedicated to card making sketches
Four Greeting Cards Ideas with One Card Making Template,
where I talk more about how sketches can simplify the card design process and help you come up with ideas more easily.
I’ve also created a set of printable card making sketches
that you can keep nearby and use whenever you need a quick layout idea for a new card.
👉 Card making printables you'll love - visit Card Making section in my shop.
Layering cards doesn’t have to be complicated.
Once you understand the basic idea — placing slightly smaller layers on top of each other — you’ll be able to create beautiful handmade cards with very simple materials.
With a card base, a few panels, and a little creativity, you can design endless card layouts that feel thoughtful, balanced, and uniquely yours.
And sometimes, the easiest designs turn out to be the most charming ones.