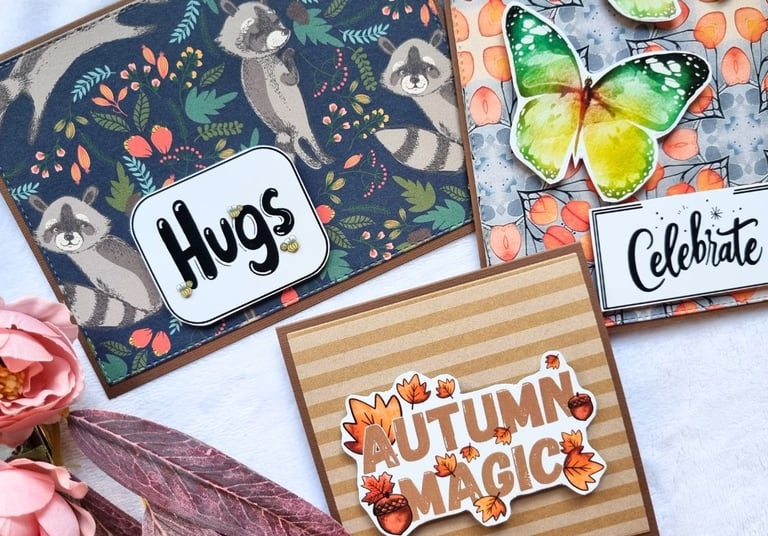
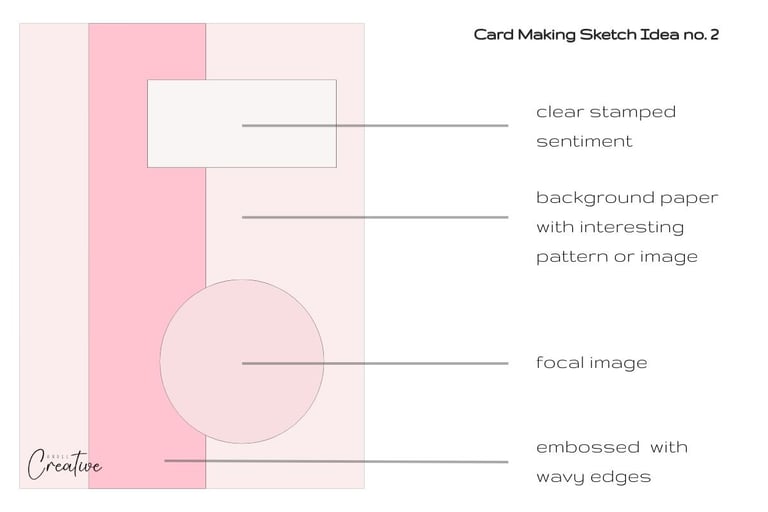
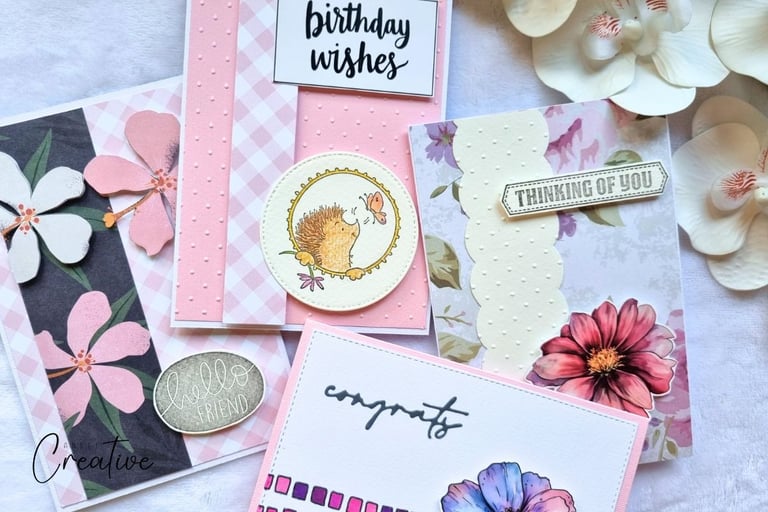
Four Greeting Card Ideas with One Card Making Template
When you're new to card making, one of the biggest questions is: Where do I start? You want to make something pretty, but figuring out where to place your elements—backgrounds, sentiments, images—can be tricky. That’s exactly why card making sketches (or card templates) are such a helpful tool. They’re not just for beginners—they’re perfect for quick and easy card making at any level.
What makes sketches so versatile is that you can follow them closely or let them inspire you to try new ideas. Whether you're in a creative rush, crafting last-minute, or just don't want to overthink the design, having a solid sketch saves time and still leaves plenty of room for your personal touch. If you're new to the concept, I recommend checking out my post on Card Making Sketches for Card Making Beginners
In this post, I’ll show you how I used just one simple card layout to create four different greeting cards. The base structure stays the same, but by changing orientation, shapes, or swapping elements around, you’ll see just how far one sketch can go.
All four cards were made with a mix of techniques and my own printable card making products, so I’ll link those below if you’d like to try something similar!
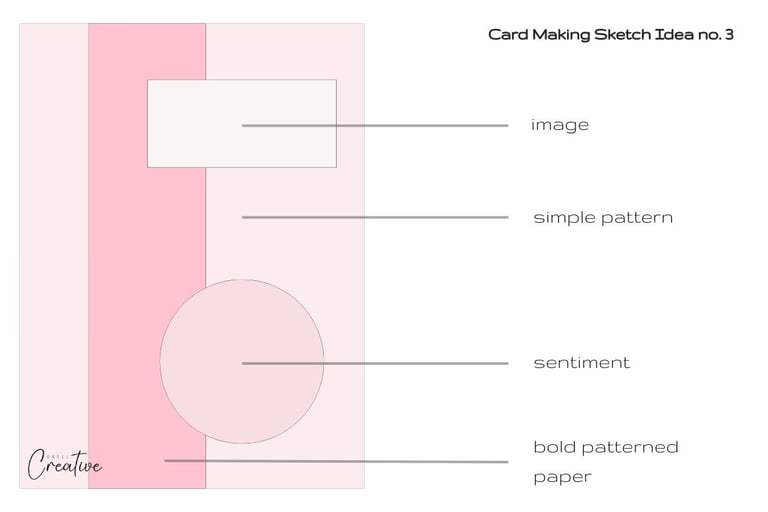
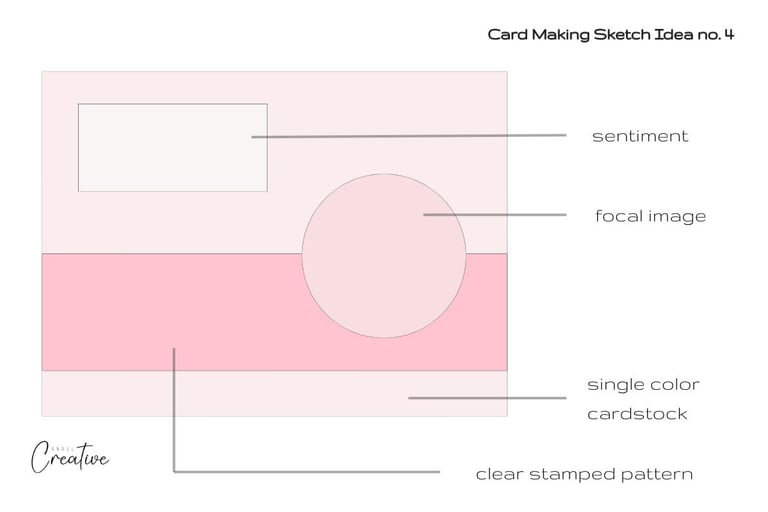
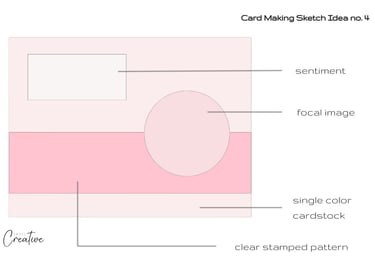
Card 1: Stick to the Card Sketch
Let’s start with the base version (short video here). I followed the sketch exactly: a soft pink embossed background (slightly smaller than the card front for a framed look), a gingham patterned stripe, a round focal image, and a sentiment placed at the top.
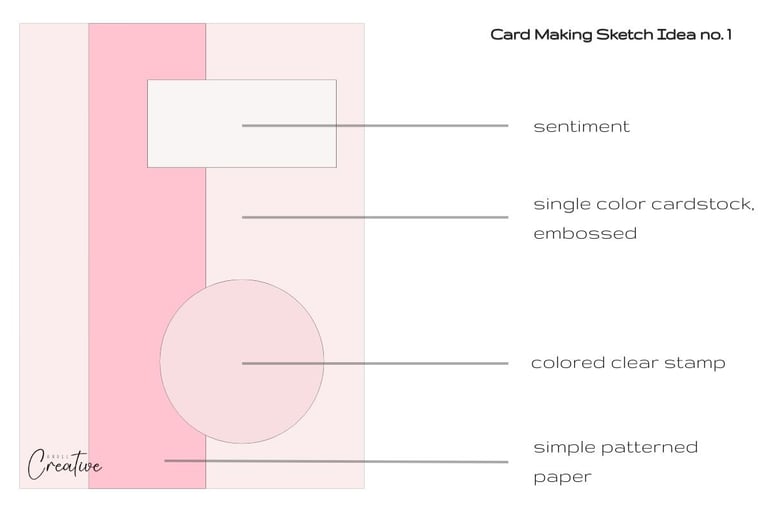
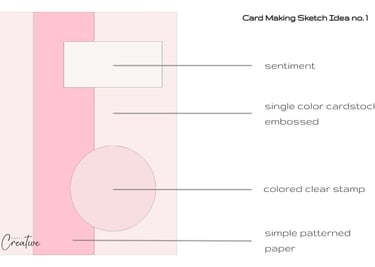
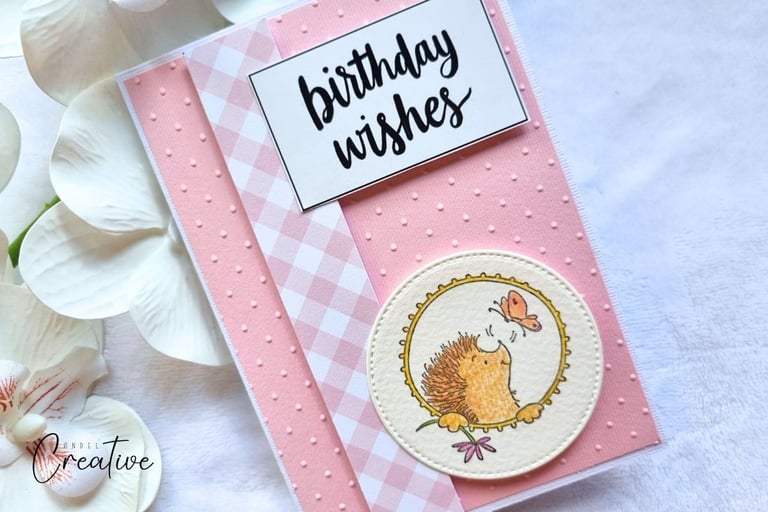
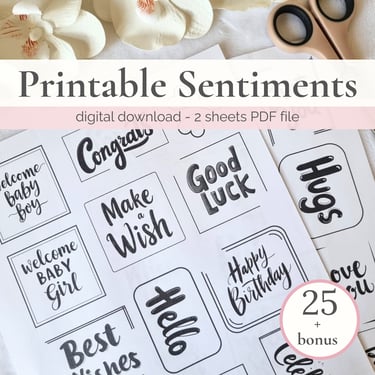
The focal image—a sweet little hedgehog—was clear stamped, colored with wooden coloring pencils, and die-cut into a circle. The sentiment is from my printable sentiments collection, making it easy to finish off the card without needing stamped sentiments.
This is a great example of how a simple mix of texture, soft color, and a cute image can come together into a clean and cheerful card.
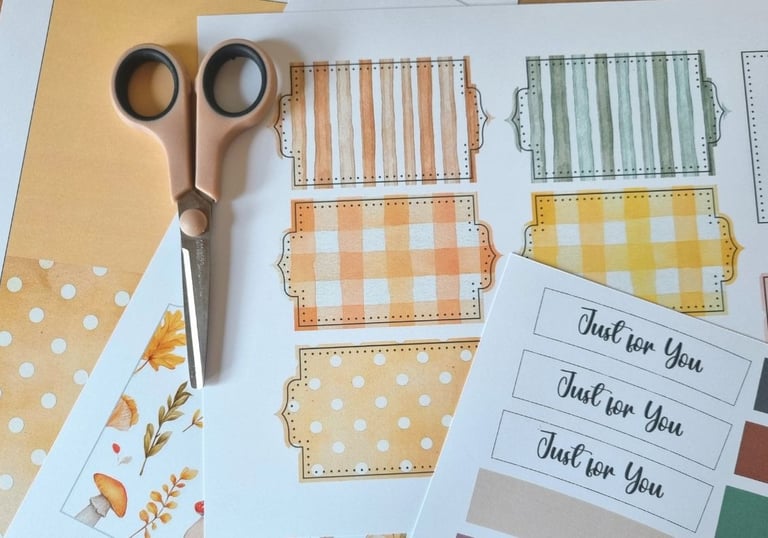
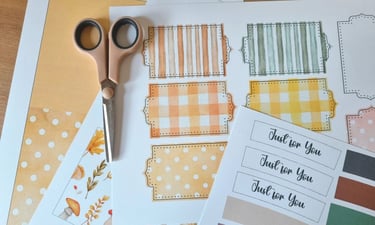
🡒 Like this printable sentiment? It's available in my shop here. Just print and cut—great for beginners who do not have Sizzix, die cuts, inks, and clear stamps.
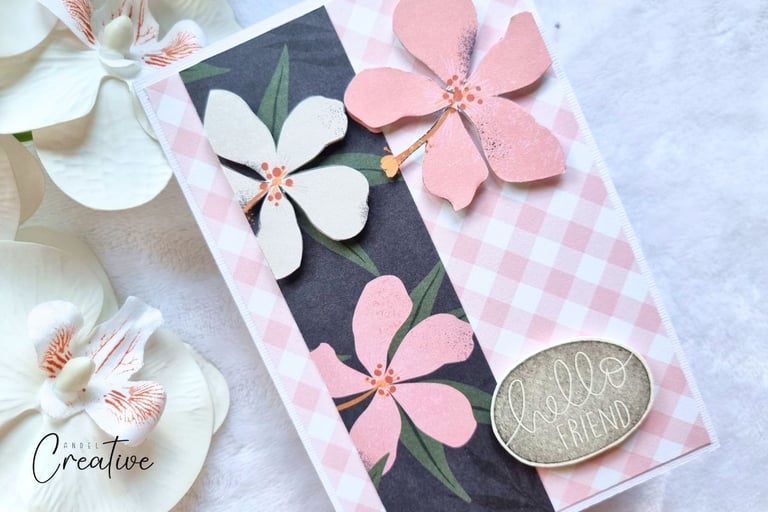
Card 2: Add a Little Twist
Now let’s play a bit. For this one, I kept the same layout but gave each element a twist—literally.

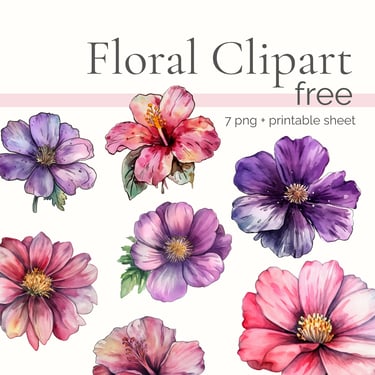
The pink embossed strip now has a wavy die-cut edge for more visual interest. I used a floral patterned paper as a full background this time, skipping the card base border. The focal image is a large cut-out flower and the sentiment is clear-stamped.
🡒 Want to try this flower? You can download the pink and purple floral printable sheet for free from my shop here. Just print and fussy cut—great for last-minute card making.
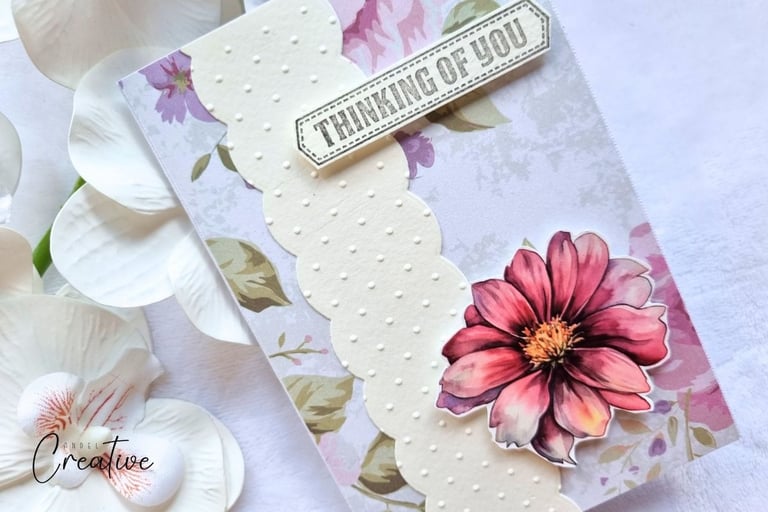
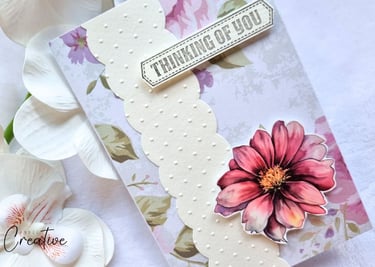
Card 3: Swap the Places
Who says the sentiment has to be at the top?
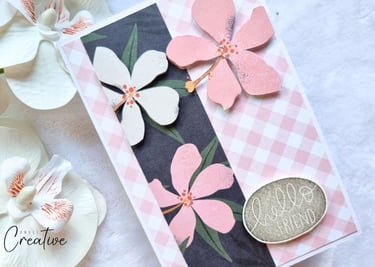
This time, I swapped the positions of the focal image and sentiment. The background is soft and light, while the stripe is bold and slightly wider to create contrast.
For the sentiment, I used an oval stamp with a bold inked background and thin “Hello Friend” lettering—it has that reversed look, where the background is solid and the message appears lighter or cut out, matching the boldness of the stripe.
To finish the card, I added cut-out pink and white flowers, popped up with 3D foam squares. They’re from the same patterned paper I used for the border, which helps tie the whole card together. It still follows the original layout—but the card feels totally different.
Want to Try These Too?
Here are card making printables that can help you make quick and easy handmade cards.
Card 4: Change the Orientation
Templates are just a suggestion—you can rotate them! For the last card, I turned the sketch horizontally (short video here).
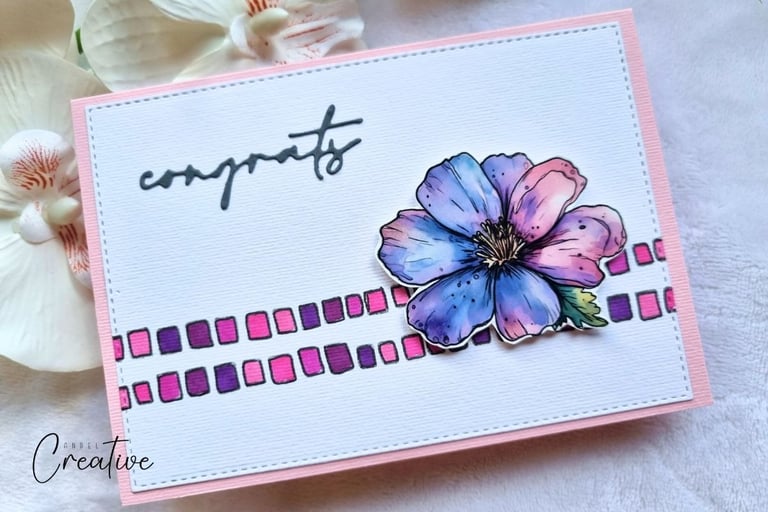
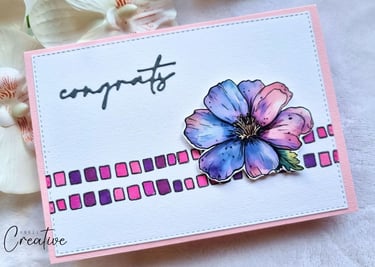
Instead of cutting a stripe, I stamped one using clear stamp and colored it in with markers. The focal flower (again from my free printable!) was layered over that and I used a die-cut handwritten “congrats” for the sentiment. The whole card feels clean and modern, but still fits the original layout. Just sideways.
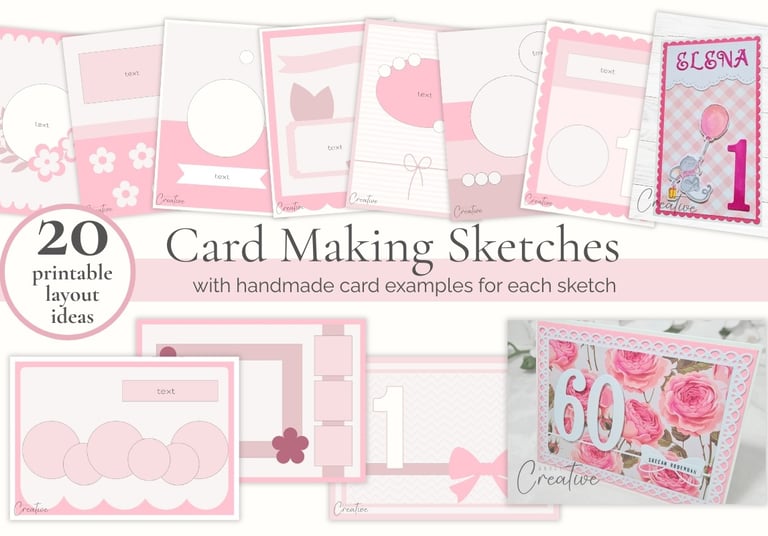
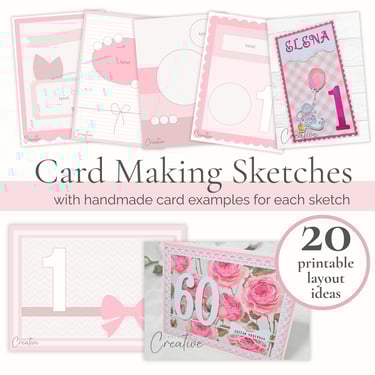
🡒 Want more layout ideas? Check out my printable card making sketches made especially for beginners and weekend crafters. They're designed to be beginner friendly and flexible. And the best part? Each template comes with an example card so you can see how it looks in action, making it even easier to get started.
Whether you’re a beginner just dipping your toes into card making or someone who’s been crafting for years, I hope this post shows how one simple layout can lead to endless designs. Try mixing up colors, textures, sentiments, or orientations—and don’t be afraid to follow your creative instincts.
Have fun with it! And if you end up using this sketch, I’d love to see what you make. Feel free to tag me or leave a comment below.
Happy crafting!