Card Making Printables for Beginners: A Practical Guide to Printing at Home
When it comes to card making printables, almost everyone (myself included) will tell you that the best results come from printing on cardstock. And yes — cardstock is great. But what if your home printer doesn’t support cardstock, you don’t feel like going to a local print shop, or you’re simply in the mood to make cards right now?
Good news: you can absolutely still use card making printables at home — and get beautiful results.
In this guide, I’m sharing four important things to know about printing card making printables at home, especially if you’re a beginner or using a basic home printer. These are small details, but they make a big difference when it comes to how your finished cards look and feel.
US Letter Size vs. A4 Paper Size
One of the first things to be aware of when printing card making printables is paper size.
In the USA, US Letter is the standard, while most other countries use A4. Printable PDF files are usually designed for one of these sizes, and this information is normally written in the product description.
For example, my card making printables are set to US Letter size, but they can also be printed on A4 paper. You just need to adjust the paper size in your printer settings before printing.
When you open the PDF in your printer settings:
Look for Paper Size or Page Size
Select A4 or US Letter, depending on the paper you’re using
If the paper size isn’t set correctly, parts of the design can be cropped or positioned oddly. Taking a moment to check this setting helps make sure everything prints as intended.
Colors May Vary (And That's Normal)
When buying card making printables (or any digital files), it’s important to know that colors may look different depending on where and how they’re viewed.
The colors you see on your screen can look different depending on monitor settings, and printed colors depend on your printer, ink, and print quality. A home printer usually produces softer, more muted colors, while professional printers tend to print more saturated tones.
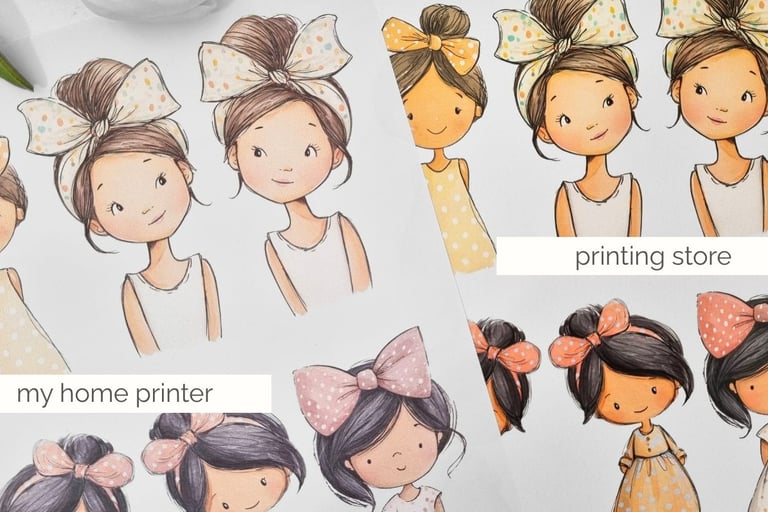

When I print my card making kits at home, the colors are much softer than when I print the same files at a local print shop. And honestly, I personally prefer that softer look.
Resizing Card Making Printables Before Printing
Most card making printables are already sized for easy use, but sometimes you may want to adjust them. In your printer settings, you’ll usually find a scale option, which is set to 100% by default.
To make elements smaller, set the scale below 100%
To make elements larger, set the scale above 100%

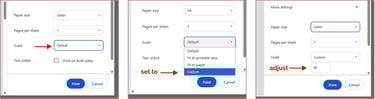
Scaling down is always safe. Scaling up can work too, as long as the design still fits on the paper size your printer supports. If the scale is increased too much, parts of the design may be cropped.

Using Card Making Printables Without Printing on Cardstock
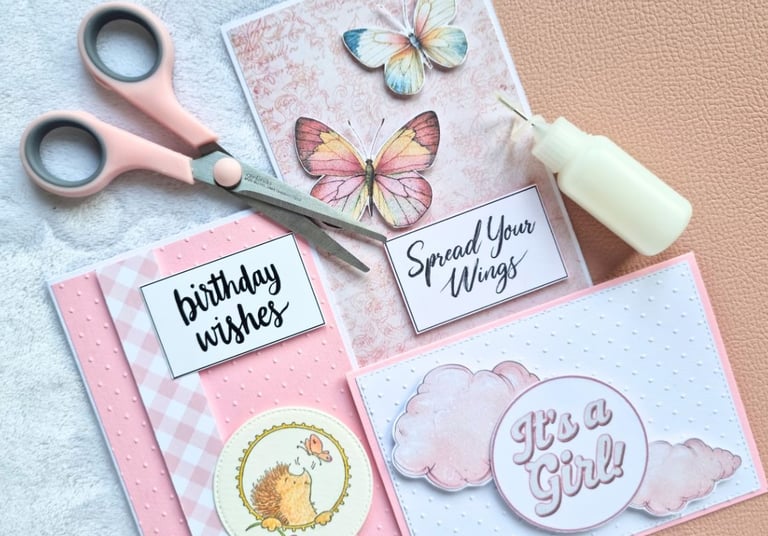
If your printer can only print on regular copy paper, don’t let that stop you from using card making printables. Copy paper may feel thin at first, but with a few simple techniques, you can turn printed elements into sturdy, high-quality pieces that work perfectly for handmade cards. These methods are beginner-friendly, don’t require special tools, and are great if you enjoy a bit of hands-on cutting and layering.
Before choosing a method, one thing is especially important — the glue. You want one that doesn’t wrinkle the paper and bonds evenly, so your cutouts look clean and professional. A weak or messy glue can make even a pretty design look sloppy — whether it’s for a gift, a card for a friend, or a project you’re selling.
Now let’s look at a few simple ways to use card making printables when printing on copy paper.
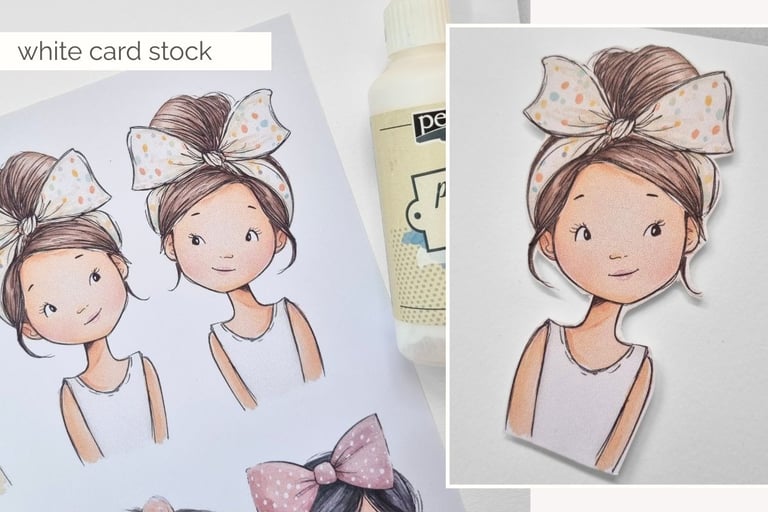
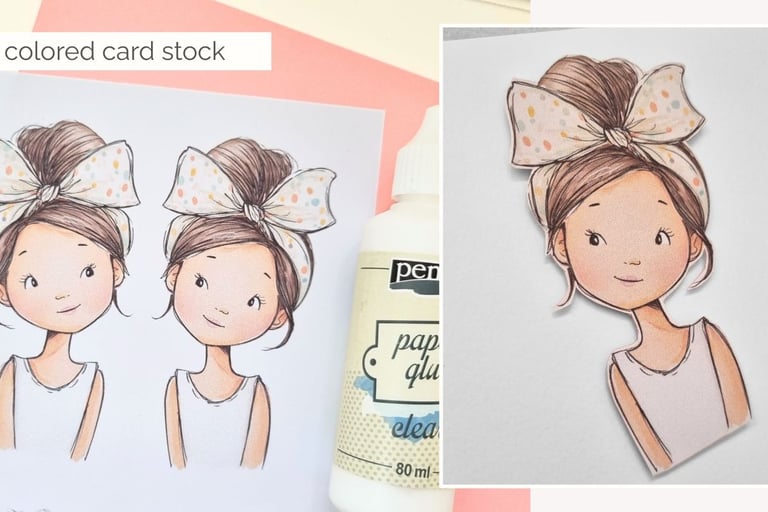
Option 1: White Cardstock as a Base
This is one of the easiest and most reliable ways to use card making printables when printing on copy paper. It’s perfect if you want a clean, classic look and like to have full control over cutting your elements by hand. White cardstock also keeps the printed colors looking true and works well for almost any card design.
How to do it:
Print your card making printables on copy paper
Roughly cut around the elements (images, backgrounds, sentiments)
Turn the cutouts over — you’ll see the outlines through the thin paper
Apply paper glue along the element edges and lightly in the center
Place the element onto white cardstock
Use a small piece of fabric or soft cloth to gently smooth the glue from the center outward
Once dry, cut the element again neatly with scissors or a craft knife
This works great because cardstock adds firmness, and your printed element looks clean and professional.
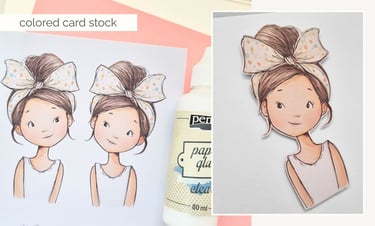
Option 2: Colored Cardstock as a Base
This method is the same as the previous one, so you might wonder what the difference is. Depending on the thickness of the copy paper, colored cardstock can be slightly noticeable around the edges, giving the printed elements a different tone—especially when white copy paper is used.
If you attach the elements with foam tape, the shadow underneath also looks different, particularly on white or other light-colored card bases. The edges of the cut-out elements are colored as well, which makes this method great for matching your printable elements to your overall card design colors.
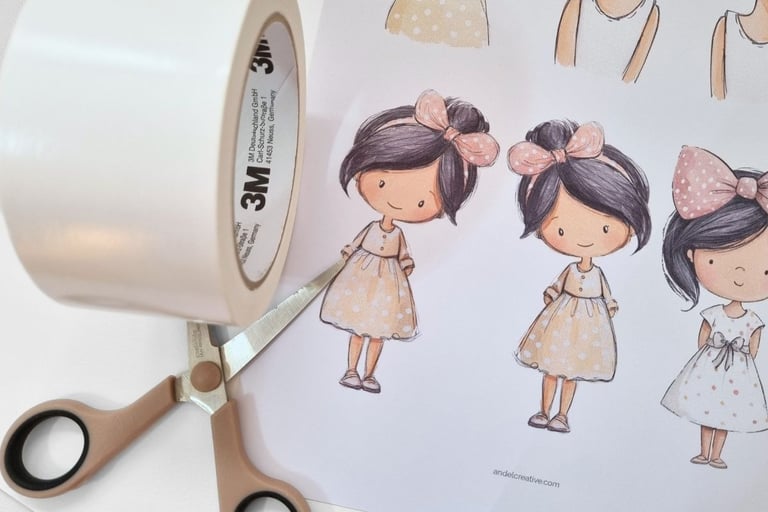

Option 3: Double-Sided Tape Method
This method is great if you want maximum hold and less waiting time. Because the entire back of the printable element is supported, it creates a very sturdy result and works especially well for smaller pieces or detailed designs. It’s also a good option if you’re not a fan of liquid glue. Here's how to do it:
Choose the cardstock (any color you like; I usually choose white).
Apply double-sided tape to the cardstock, cutting it slightly larger than the printable element.
Peel off the tape backing.
Place the printable element onto the tape, making sure it’s fully supported.
Cut out the element again.
The downside of this method is that can leave tape residue on your scissors, making them sticky and not very usable. But there's an easy fix to that. Read it in my Basic Tools for Beginners blog post.
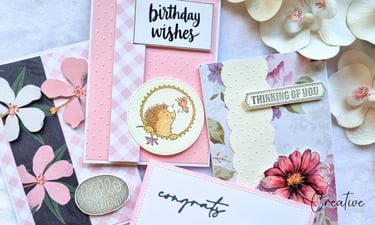
Want to try card making printables? Check out my card making collection at my store. Easy to use - just print, cut & glue.
As the name card making printables suggests, printing is an important part of the process — but it doesn’t have to be complicated or perfect.
You don’t need a special printer or fancy equipment to enjoy using a card making kit at home. With a few small adjustments and simple techniques, you can make printables work with what you already have.
I hope this guide helped clarify how to print and how to use card making printables, especially if you’re just starting out. Card making is about enjoying the process, experimenting, and finding what works best for you.