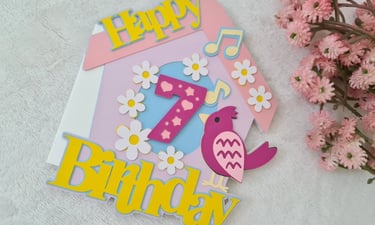
Quick & Easy Birthday Card with Cricut
When you're short on time but still want to give something handmade and meaningful, a quick Cricut project can save the day! My son was invited to a birthday party for his little sports playmate, and I needed a last-minute card idea that was simple, fast, and still personal.
Something Quick, Personal, and Sporty
Since they know each other through sports, I thought a soccer-themed card would be just right. I opened up my Cricut Design Space and headed straight to Creative Fabrica to look for a cute, sporty SVG. And I found the perfect one — a set of soccer-themed numbers that made the whole idea come together instantly. You can grab that same file here.
Just a heads-up: this blog contains affiliate links. That means if you click through and decide to make a purchase, I may earn a small commission at no extra cost to you. Thanks for supporting my crafting habit!
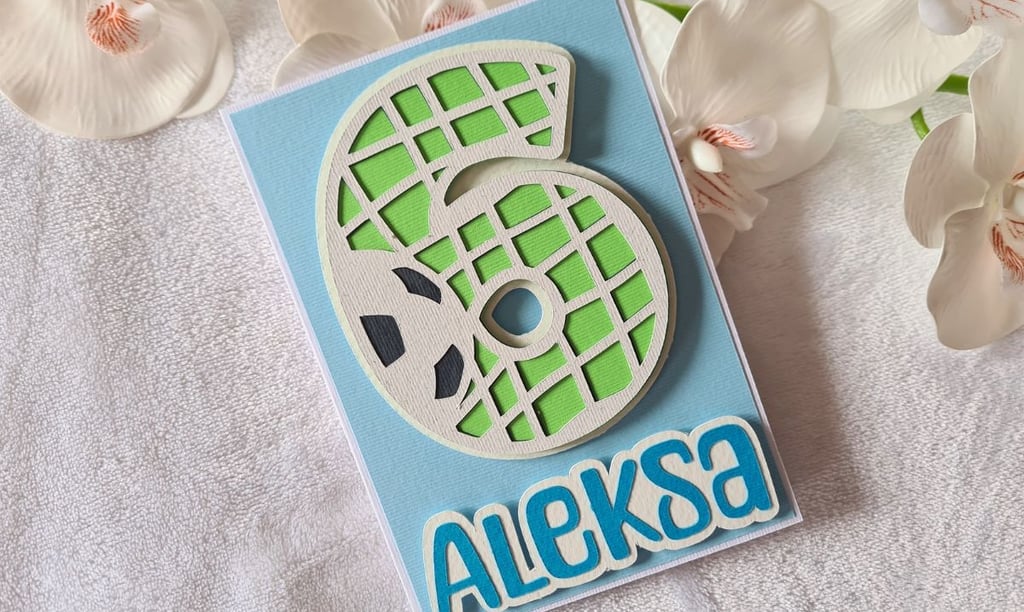
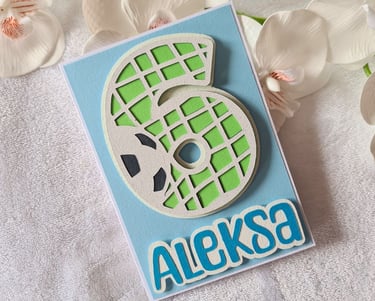
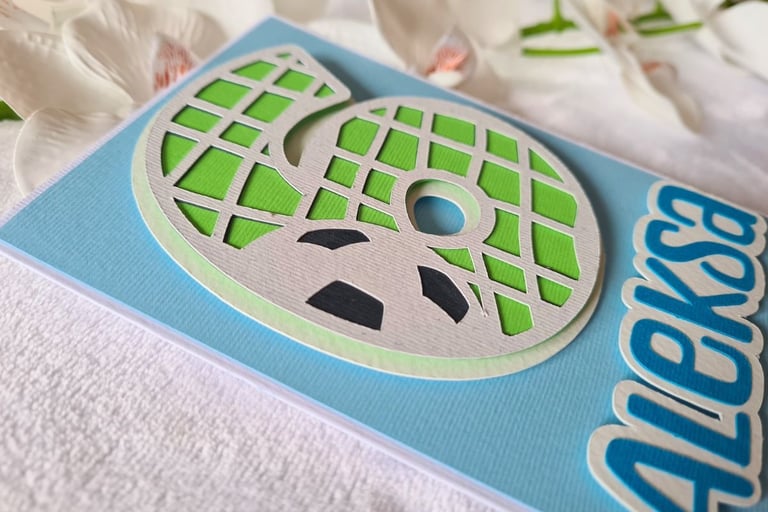
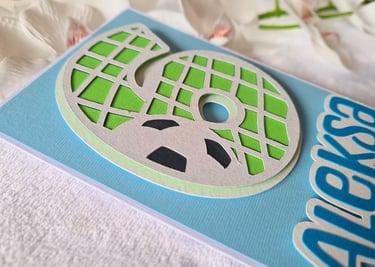
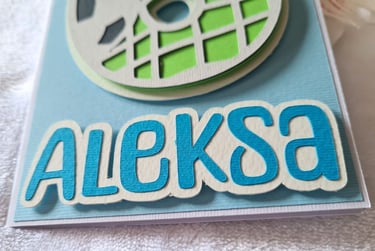
Even when I’m in a rush, I like adding a personal touch. So I kept the design simple: a soccer-themed number with the birthday boy’s name underneath, in shades of green and blue — nothing too complicated, but still fun and cheerful.
Tools & Materials
I made the card with my Cricut Maker 3, but you can totally make it using the Cricut Explore Air 2 or even the Cricut Joy Xtra (you’ll just need to adjust the sizing a bit). For the blade and mat, I used the fine point blade and the green standard grip mat.
Here’s what you'll need to make this card:
White cardstock (for the card base, name offset, and number's layer 1)
Light blue cardstock for the background
Dark grey or black for the number (layer 2)
Bright green for the number (layer 3)
Dark blue for the name (letters)
Paper glue
Double-sided foam tape
Scissors
Tip: For the base, I love using a sturdy watercolor paper — about 300 gsm (that’s roughly 140 lb cardstock) — because it makes the card feel more substantial. If you have premade card bases, you can skip cutting the base entirely and save a bit of time.

How to Make a Card Using Cricut Design Space
Download & unzip the soccer number SVG file using WinRAR or another unzip app.
Open Cricut Design Space and upload the SVG.
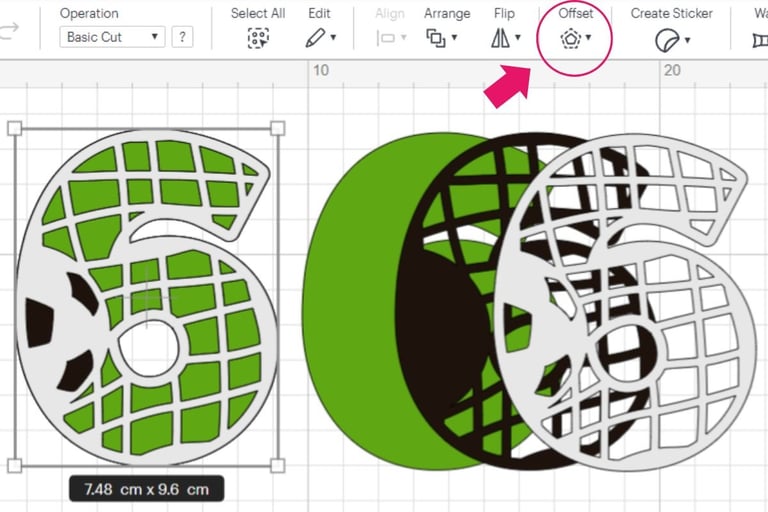
Once uploaded, right-click → Ungroup, then delete the numbers you don’t need.
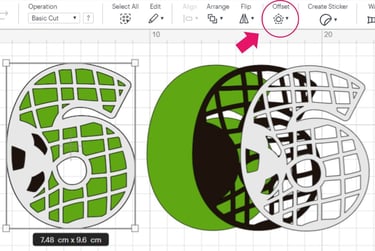
The file includes three layers per number, which you can use as is, or add an extra white offset like I did (for more depth): Select the number → Click "Offset" → Set to 2.5 → Apply → Change the offset color to white.
Use the Text tool to type the name. I used the font Ambery Garden, which you can download here.
Set the name color to dark blue.
Add an offset at 2.5, then apply. Remove all contours (bottom right corner/contour/hide all contours) and change the offset color to white.
Sizing Everything to Fit
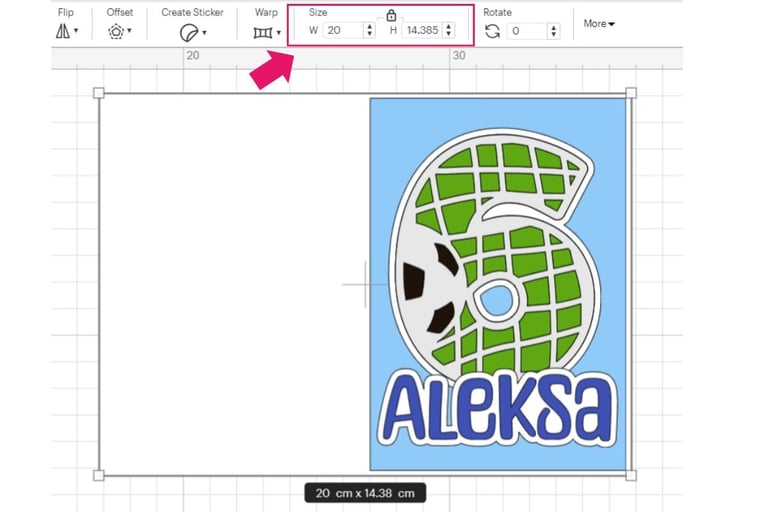
Before starting, decide on the size of the card. A good tip is to create a rectangle (light blue in my case) in your desired card size to act as a background guide. Then, resize and arrange all other elements on top of it until everything looks just right. There's no need to stress about converting every number perfectly. In Design Space, if you just enter the height (H:) and keep the proportions locked, Cricut will automatically calculate the width (W:). I wanted my card to be 10 x 15 cm when folded which is approximately 5 x 7 inches, so I entered 20 in W: section and Design Space fit the matching height.
If you're working with a double-digit birthday (like 10 or 11), I suggest flipping the card horizontally to landscape orientation. That gives the numbers more space and keeps the layout balanced. You might want to slightly scale down the number height or name to make sure everything fits.

Assembling the Card
Before you start gluing, place all the pieces on the card base first to make sure you're happy with the layout. Once the layout looks good, start adhering with glue or foam tape.
Fold the white card base in half.
Glue the light blue cardstock panel onto the card base using paper glue.
Layer the number pieces (white on dark grey, dark grey on green) using paper glue.
Attach the finished number to the white offset layer with foam tape.
Mount the number onto the card front using foam tape.
Glue the letters to the white name offset.
Attach the name to the card using foam tape.
How long did it take? All in all, this card came together in about 25 minutes. Measuring a mat takes time but I saved a bit of it by cutting two colors of cardstock on the same mat — a little trick I often use when I'm crafting on a deadline. If you want to see what that looks like in action, you can check out the short video I made here.
With just a few basic supplies and a reliable cut file, it’s easy to create something cheerful and memorable — even when time is short. If you ever find yourself short on time but still want to add a personal touch, this is a great go-to idea. Just pick a theme the child will love, personalize it with their name or age, and let your Cricut do the magic. Give it a try the next time a last-minute party pops up!